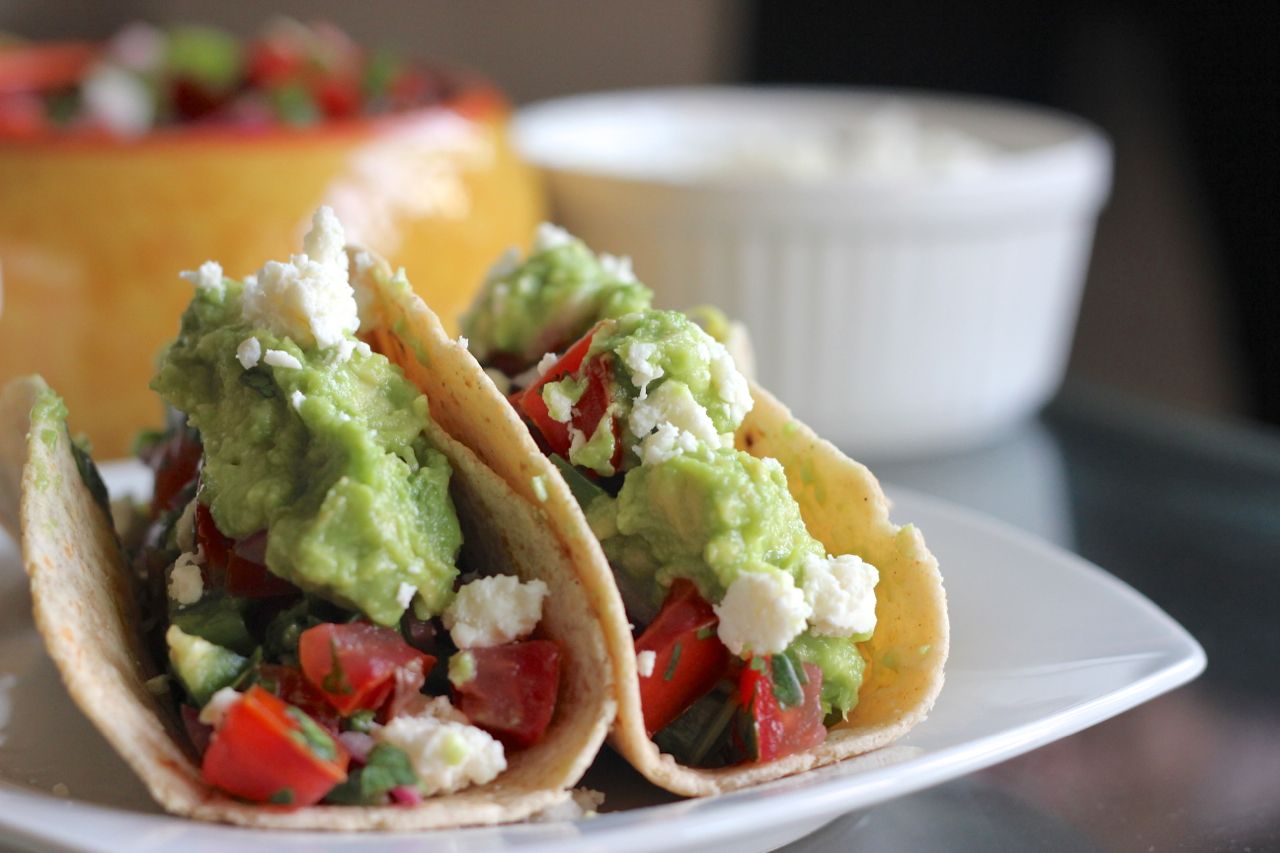
I am going to be real with you guys. This meal is slightly – and I mean, sliiightly – a labor of love. Only because there are a lot of toppings. And because there is lots o’ chopping. And some crying may also be involved (thanks to all the onions and the time you are forced to patiently wait before you can put these tacos in your belly).
But, who doesn’t love tacos!?!? And who doesn’t love a plethora of toppings?!?!? No one. That’s who. No one does NOT love tacos and no one does NOT love a plethora of toppings (p.s. that quadruple negative was for effect, because effect needed to be given – this is all very serious business). So, although this a touch time intensive, the final result is well worth wait . . . and the tears.
So, on that note, let’s do this!

First up is the carne asada . . . .
Carne Asada
Ingredients
- 2lbs skirt or flank steak
- 6 garlic cloves, roughly chopped
- 1 jalapeño, roughly chopped
- 1 handful of cilantro (I love cilantro, so I added a little more than a handful)
- 2 limes, juiced
- 1 orange juiced,
- 2 tablespoons white vinegar
- 1/2 cup olive oil
- Salt and black pepper, to taste
Instructions
- Throw the garlic, jalapeño, cilantro, lime juice, orange juice, vinegar, olive oil, salt and pepper in a blender and blend. That was easy enough, right? Tip: For the limes and orange, if you don’t have a fancy juicer thing, dig in the citrus with a fork. It really helps release all the juice(s).
- Put the steak in a baking dish and pour marinade over it.
- Let the steak marinate in the refrigerator for at least 1 hour and up to 8 hours. (But not any longer, or else the citrus will break down the meat, making it mushy. And no one likes mushy meat. . . .)
- While the steak is marinating, you may want to get started on the toppings (see instructions below).
- Remove steak from the refrigerator, season again with salt and pepper, and let it come to room temperature.
- Heat a grill (or your oven broiler), and cook on each side for 7 to 10 minutes for medium-rare, or a little longer on each side depending on how you like your steak cooked.
- p.s. I used an outside grill for the first time during this recipe – it’s usually my husband’s thing – and failed by overcooking the meat. How sad. Luckily, it was still delicious!
- p.p.s. I also failed by failing to cut the meat against the grain, which is not a mistake you want to make with flank steak. But, after realizing the error of my ways, I just cut up the steak into small bite sized pieces, and all was right in the world again! (I also realized that I actually prefer the steak in bite-sized pieces because (1) that is how the taco truck men serve their tacos, so it just felt more authentic in my mind and (2) I think it makes eating the taco way less messier.)
Pico De Gallo
Ingredients
- 5 plum tomatoes, diced
- 1 medium red onion, diced
- 2-3 jalapeños, finely diced
- 1-2 handfuls of cilantro, finely chopped
- 2-3 limes, juiced
- Salt, to taste
Instructions
- De-seed the tomatoes, and then dice into small pieces. Throw in a medium-sized bowl.
- Dice the onion into small pieces (try to keep them about the same size as the tomatoes). Throw in the bowl with the tomatoes.
- Finely dice the jalapeños. If you want this spicy, keep the seeds in. If not, de-seed. Throw the jalapeños into the bowl with everything else.
- Chop a handful or two of cilantro. Don’t be shy about this part. For me, cilantro gives pico de gallo life. So I don’t skimp here. Once chopped, throw in the mix and stir.
- Now add the juice of two to three limes to the mixture, depending on how juicy your limes are and how acidic you like your pico. I love lime juice, so I tend to err on the side of more juice. Don’t be afraid to taste as you go along, and don’t be afraid to dig in that lime with a fork to get all the juice out!
- Salt to taste. If you are going to eat this with chips, keep that in mind when seasoning (you may need less salt than if using as a stand alone topping).
Chimichurri
Ingredients
- 1 bunch cilantro
- 1 bunch italian parsley
- 2 limes, juiced
- 1/4 cup onion, chopped
- 1/2 -3/4 jalapeño
- 2 garlic cloves
- 1/2 cup olive oil
- 2 tsp cumin
- 2 tsp coriander
- Salt, to taste
Instructions
- In a blender or food processor, add onion, jalapeño, and garlic and pulse several times until ingredients are further chopped.
- Next, add cilantro and parsley and pulse several times again.
- Add remaining ingredients and pulse until completely combined.
——BREAK TIME: Are you guys still with me?! Are you fatigued from all this chopping and blending? If so, don’t worry, it’s completely normal. Take a breather, admire your beautiful work thus far, have a refreshment, regroup your thoughts, remember the ultimate delectable end goal of all this, and let’s continue on with the caramelized onions. ——
Caramelized Onions
Ingredients
- 2 large sweet Vidalia onions, sliced (Note: Onions are like spinach. They look plentiful at the outset, but they reduce significantly once cooked all the way down. So, if you want a ton of caramelized onions, you may want to double this recipe)
- 2 tbsp olive oil
- Salt
Instructions
- Heat oil in pan on medium-high heat.
- Add onions and reduce heat to medium.
- Cook the onions for about 10 minutes, stirring every few minutes, and then add the salt. The overall trick to caramelized onions is to allow the onions to sit long enough to get some color, but also to stir constantly enough to make sure the onions don’t burn. So I typically stir the onions every 3-4 minutes, or so.
- Continue cooking the onions, stirring every few minutes. After about 20 minutes, you may want to further reduce the heat. If the onions are starting to dry out at this point or stick too much, add either a little more oil or a splash of water. The more caramelized the onions become, the more frequently you may need to stir to prevent burning and sticking. In total, you will need to cook the onions for about 4o minutes to an hour for them to be completely done.
- Once done, remove from heat and set aside.
Other Toppings + Accoutrements
Ok, we are getting close you guys!!! Can you feel the excitement in the air?! I can.
To wrap this all up, below are some additional toppings that you may want to quickly prepare to go with your tacos:
- Cotija cheese – simply, pre-crumble the cheese before serving.
- Cilantro – finely chopped.
- Mashed avocados – I just added some lime juice and salt, and it was a perfect creamy topping to counterbalance the heat in some of the other toppings.
- Lime slices – I love lime and can never have too much of it.
- Tapatio – I don’t have enough time to discuss right now, but just know that I may be addicted to this stuff.
- Flour or corn tortillas (warmed in a skillet prior to serving) – I have something very important to tell you regarding the tortillas. If you want to take this dish to a whole ‘nother level, do yourself a favor and go get you some La Tortilla Factory Hand-Made Style Tortillas. You will not be disappointed and you will never, ever, ever go back to any other brand of store bought tortilla ever again. Thank me later.
Okay, we have now reached the promised land everyone! It is time. Assemble your tacos, revel in all their taco-y and topping-y glory, rejoice, devour, enjoy!
xoxo,


